The more I work with it, the more I like it, that is, the ArcGIS Server JavaScript API. It has some real funkyness that is hard to get use to at first (loose or no typing, dynamic nature, callbacks, etc) but once you get going, it is pretty slick. Given this, I am going put up a few posts in the coming weeks that illustrate very simple samples that I think are useful. These aren't elegant, OO examples, just examples so all JS pros out there will probably find these post of little use. They are based on the ArcGIS Server JavaScript API 2.0 (and ArcGIS 10).
Generally speaking, usability is often the single most important factor dictating the success or failure of your geoweb application. Make it simple and fool proof and guide the user through the workflow or task. If they get confused, you have failed. One component that can be used to help accomplish this is a pre-populated drop-down/search box that auto-completes. DOJO, the toolkit that the ArcGIS Server JavaScript API is built on, provides a lot of nice components for doing just this. One of these is dijit.form.FilteringSelect. It does a lot of cool stuff which assist in fool proof usability, much more that what is mentioned here. This post addresses how to populate a FilteringSelect dijit with the results of a query, in this case, the query of an ArcGIS Server map service layer’s field value. It is assumed that you know the very basics of using the ArcGIS Server JavaScript API, if not, have a look.
Instantiating a FilteringSelect dijit can be done declaratively or programmatically. In this case, we will declare it:
<body class="tundra">
<input dojoType="dijit.form.FilteringSelect"
id="lineid"
searchAttr="name"
name="widgetName"
onChange="doSomething(this.value)">
</body>
where the id attribute is used to identify the component in the document, the onChange attribute defines the event handler when the component is changed and the searchAttr attribute, well, we will discuss that later. Remember to define your component before declaring it using dojo.require("dijit.form.FilteringSelect"). Now that the component has been declared, lets populate it. A best practice for initializing web maps along with selected stuff that goes along with them (such as our FilteringSelect component) is to define a function that is called when the the page is loaded. This is handled nicely using the dojo.addOnLoad() function. Something like:
//Our main initialization function, called at just the right time
function init () {
//Create your query
var queryTask = new esri.tasks.QueryTask(<query task rest endpoint>);
//set the onComplete event handler, in this case, when the query is complete, call initLineID,
//production code would handle handle the error callback as well
dojo.connect(queryTask, "onComplete", initLineID);
//build and execute your query
var query = new esri.tasks.Query();
query.outFields = [<name of the field you want>];
query.text = "all";
query.returnGeometry = true;
queryTask.execute(query);
}
dojo.addOnLoad(init);
In the snippet above, we are basically building a query task and executing it. For details on the queryTask works, have a look at the queryTask object (everything is an object is JS, another kind of weird thing to get use to).
Now the good stuff, populating the FilteringSelect component. We first need to bind the completion event of the query to some logic that will populate the FilteringSelect component. This is done using a handy little dojo function:
dojo.connect(queryTask, "onComplete", initLineID);
which basically says once the queryTask fires the onComplete event, take the results and run with them in a function called initLineID. Here is initLineID:
function initLineID(features) {
var lineIdObjects = [];
dojo.forEach(features.features, function(feature) {
lineIdObjects.push({"name": feature.attributes.field_name});;
});
//Build the appropriate data object for our data component
var data = {
"identifier": "name",
"items": lineIdObjects
}
//bind the data object to the datastore
var lineDataStore = new dojo.data.ItemFileReadStore({data: data});
//bind the data store to the FilteringSelect component
dijit.byId("lineid").store = lineDataStore;
}
Basically, we take the queryTask results, in this case referred to as "features" and refactor them into a ItemFileReadStore which is then bound to the FilteringSelect component. Most of the UI components in DOJO work best consuming data from one of the DOJO data stores, in this case we are using the ItemFileReadStore. ItemFileReadStores basically house JSON data formatted in a specific way. Unfortunately, direct REST requests made to the ArcGIS Server Rest API don't return JSON formatted in this way which would have made things very easy but we will leave that for another time.
Because of this, we basically need to refactor our queryTask's returned features in a way that the ItemFileReadStore likes (see, "Reading JSON Data with DOJO"). We do this by creating an array object and populating it by stepping through each queryTask feature and adding it to the array as a name/value pair (one of the ItemFileReadStore format requirements). We then build a generic object called "data" with 2 properties, "identifier" and "items". The identifier property tells the ItemFileReadStore what handle to look for in the name/value pairs collection (our array). In our case, we named each result record "name." The second property called "items" is assigned our array. Upon completion of this generic data object, we then simply bind it to the ItemFileReadStore using some named property. In this case, we are calling it "data" as well. Our final step is to find our FilteringSelect component in the document using the dojo.byId function and to assign its store property the ItemFileReadStore we created. Thats it...
One final note on what I skipped earlier. Remember that we assigned each of our queryTask feature values a attribute name called "name" and assigned our required "identifier" property and value of "name" as well:
var lineIdObjects = [];
dojo.forEach(features.features, function(feature) {
lineIdObjects.push({"name": feature.attributes.field_name});;
});
//Build the appropriate data object for our data component
var data = {
"identifier": "name",
"items": lineIdObjects
}
this is the handle that is used by the FilteringSelect component to find where to look for the data. We tell the FilteringSelect component where to look for the data values using the searchAttr attribute:
<body class="tundra">
<input dojoType="dijit.form.FilteringSelect"
id="lineid"
searchAttr="name"
name="widgetName"
onChange="doSomething(this.value)">
</body>
You can download this sample here.
Tuesday, June 29, 2010


Wednesday, April 7, 2010
Twitter Use For Geo Pros: The Good and the Bad
I have used Twitter for about a year now and have 225 followers. I started using it in a professional capacity, trying to learn from and connect with people in the geosphere. I work in a technical capacity professionally but don't really consider myself a bleeding edge techie or a gadget for gadget sack kind of person. Basically, what can help me do my job better. Anyhow, after a year of use, I feel I am credibly positioned to give a critique on its effectiveness and usefulness for geopros.
I have tried to keep my opinions truly objective. I have received a fare amount of grief by a variety of people in my life regarding its use. My "traditional" colleagues think I'm nuts. Others just don't understand. My favorite line is "What's with this Twitter crap". My wife quivers each time that annoying Tweetdeck chirp chatters from my laptop sitting in my home office (make sure to turn that off). Given this disclosure, here is my take:
The Good
I have tried to keep my opinions truly objective. I have received a fare amount of grief by a variety of people in my life regarding its use. My "traditional" colleagues think I'm nuts. Others just don't understand. My favorite line is "What's with this Twitter crap". My wife quivers each time that annoying Tweetdeck chirp chatters from my laptop sitting in my home office (make sure to turn that off). Given this disclosure, here is my take:
The Good
- If you want to learn about stuff fast, Twitter is the best. Anything, I mean anything, that you may be interested in, is posted to Twitter first. Here's the trick, you have to follow the right people (and finding those people can be easy I guess) . Examples of this stuff includes:
- The latest release of your favorite software,
- What colleagues are up to (that very instant)
- What people are saying at any given public venue (conferences, press conferences, etc...)
- Attending events such as conferences remotely
- What's new with... (you name it)
- Personal opinions about... (you name it)
- What government agencies are up to: The current federal administration has embraced social media which has resonated with many state and local governments. Using Twitter is a good way to keep track of what is going on within your government.
- Support: I recently posted a question to Twitter about a problem I was having with ArcGIS Server. An expert engineer (thanks @keyurva) working for ESRI, replied instantly to help. I can't imagine how long it would have taken via a formal incident request.
- Networking: I have virtually met a number of people that I never would have met otherwise. In some cases, these virtual relationships have lead to real ones. An example relates to my part-time role as a faculty member at a local University. Using Twitter, I was able to pursue a potential guest lecture from a great individual (thanks @agup). In addition, staying connected is much easier and quicker, granted without alot of detail but in a networking setting, it is better than the alternative.
- Data Mining: I use TweetDeck which is a pretty good tool (UberTwitter remotely). With TweetDeck, I can mine a tone of info with little effort. I swear I am observing the Matrix:-).
- Continuity: I have followed alot of people who have been great but, eventually abandon their Twitter persona. I can relate to this because it takes a bit of work to continue posting, you have to buy in a bit. Also, it is easy to think this is the coolest thing when you start and then that thought fades. You fire up your account and tweet like crazy and then your.....tweets.......start............to..............slow...................down................................until...
- I will be honest here, it is a bit narcissistic and it can kind of turn into a popularity contest if you let it. "How many followers can I get." It shouldn't be about this but we are all human. We need validation. However, if you are tweeting from your kids birthday party, the dinner table, or tweet more that lets say 15 or maybe 20 times a day (I would say less but...), you might want to lay off. Just my opinion. (Quick tip: if you want alot of followers, just tweet about different stuff, sports, religion, hobbies, politics, etc).
- Data Mining: This is a benefit and a curse. While there is alot of data and information to mine and some tools do a better job than others, alot of it is still nonsense.
- There are many more people within professional circles not using it than are. Sure within some communities (techies, developers, etc) the use is higher but I was recently at the ESRI PUG conference and during the plenary, the presenter asked who was using Twitter. I would estimate the maybe 10% of the crowd of 1200 attendees raised their hands. Just one anecdotal example.
- It seems to be lacking in security. I have noticed a few accounts I follow have been "defaced." 3 out of 225 is pretty bad.
- Is this going to continue? Whats next? Am I wasting my time? I'm not in tune with the future of Social Networking so I will leave that up to those who are.
Monday, March 1, 2010
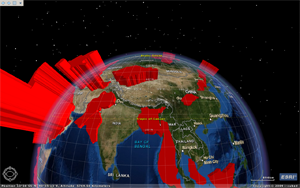
Using ArcGIS Explorer (900) for Presentations
I recently had the opportunity to present at the 2010 ESRI Petroleum User's Group (PUG) meeting in Houston. My talk was nothing earth-shattering, basically just a intro/tour of the work our team had been doing the previous year. My time-slot was short, 25 minutes with 5 minutes of Q & A. This was fine with me. Given my short attention span and propensity towards ADD behaviors, I actually prefer quick talks. Faced with this and the fact that my talk didn't contain much factual information, I wanted to try something a bit different standard slides. Although I hadn't worked with ArcGIS Explorer (AGX) much, I remembered hearing the ability within build 900 to perform some short of slide show so thought I would give it a try. The global nature of the materials I wanted to present also lended itself nicely to this platform.
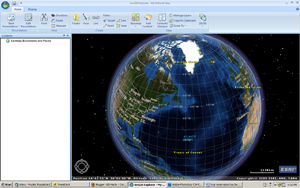

ArcGIS Explorer Build 900
The process to do this is was pretty simple. The workflow is basically to:
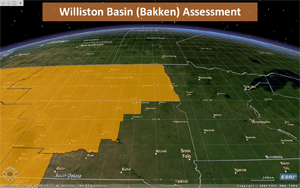
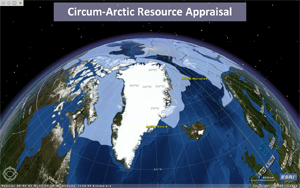
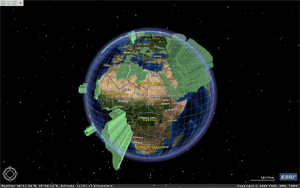
- Stylize layers in either ArcMap or ArcGlobe (for 3D stuff).
- Build an AGX project
- Navigate to various "views" and capture "slides"
- Place titles on "slides" if desired
- Activate the show by simply hitting the go button.
- Wow factor provided by the geobrowser platform, especially to non-geo audiences.
- Super easy to do, very intuitive workflow.
- From a presentation flow persepective, the platform allows for a nice, smooth talk with soft transitions.
- Informative media, not a boring slide of text or some dopey picture from istock.
- Features can be identified, both to the data layer's attribute table or hyperlink field
- Because it is so easy, it isn't very feature rich. Aside from being able to add titles, there really isn't any way to annotate your slides
- It is pretty buggy. The identify functionality works about 90% of the time, guaranteed to not work when it really counts.
- Identify only works on "data layers" but not references created by layer files. This is problematic because you need to use layer files for rich symbology (from ArcGlobe). The work around for this is to add the layer as a data layer, make it 100% transparent, then add it with the desired symbology (using the layer file) for viewing.


Tuesday, September 15, 2009
Comprehensive Look at the Geoweb (Part 3 and 4)
The the story continues... I have been off and on the buzzword "Geoweb" for several years. I am now back on it so I set out to try and take a real look at the Geoweb, at least for the sake of academics. The term is bantered about a bunch and we all have our own take on what it really is. My goal was to try to comprehensively define the geoweb based on well documented patterns, models and architectures that currently exist within the web (part 1 and part 2 of this 4 part series) as well as from a purely organic perspective. Here are the slides that were used for this discussion. I can post my lectures as well if anyone is interested.
In summary, I came up with what I think is a very nice analogy in an attempt to somehow concisely define the Geoweb. I use the analog of an ecosystem defined as:
In summary, I came up with what I think is a very nice analogy in an attempt to somehow concisely define the Geoweb. I use the analog of an ecosystem defined as:
“An ecosystem is a natural unit consisting of all plants, animals and micro-organisms (biotic factors) in an area functioning together with all of the physical (abiotic) factors of the environment. Ecosystems can be permanent or temporary. An ecosystem is a unit of interdependent organisms which share the same habitat. Ecosystems usually form a number of food webs…” (Ecosystem, 2009)
Using this, we can begin to crosswalk components of the geoweb to the notion of an ecosystem. The geoweb as a unit of something finite, is composed of biotic and abiotic factions. Biotic factors including users, participants, perceptions (top-down vs. bottom-up), change and usability. Abiotic factors such as architectures, standards, formats, specs, platforms, etc... There are a number of relationships that exist between these factors, each with their own microprocesses but all interdependent in varying ways. Finally, portions of the the geoweb are permanent and some are temporary, depending on all of the factors (and their associated relationships) listed above.
If nothing else, have a look at the references cited section at the end of the slides. It includes alot of great materials from many leaders in the community that are worthwhile having a look at.
Ecosystem. (2009, August 26). In Wikipedia, The Free Encyclopedia. Retrieved 17:10, August 26, 2009, from http://en.wikipedia.org/w/index.php?title=Ecosystem&oldid=310197121
Using this, we can begin to crosswalk components of the geoweb to the notion of an ecosystem. The geoweb as a unit of something finite, is composed of biotic and abiotic factions. Biotic factors including users, participants, perceptions (top-down vs. bottom-up), change and usability. Abiotic factors such as architectures, standards, formats, specs, platforms, etc... There are a number of relationships that exist between these factors, each with their own microprocesses but all interdependent in varying ways. Finally, portions of the the geoweb are permanent and some are temporary, depending on all of the factors (and their associated relationships) listed above.
If nothing else, have a look at the references cited section at the end of the slides. It includes alot of great materials from many leaders in the community that are worthwhile having a look at.
Monday, August 31, 2009
Tips and Tricks For the Geo Soloist
Imagine this scenario, a well educated, highly trained GIS/Geo professional is working for a small organization (county, environmental consulting, NGO, small federal agency, startup etc). Characteristics of such an organization typically include small budgets, pressure to maximize ROI of the organizations geospatial infrastructure, minimal resources (few people), you get the idea. This person is faced with meeting internal needs, typically required to perform the geoanalyses aligned with the organization's fundamental business processes ("I need a map off...") and is also tasked with presenting the valuable collection of geospatial products the small organization produces to the world. This professional is also commonly faced with requests from management that are typically articulated with something like:
If this scenario sounds familiar, you may be a Geo Soloist. Generally speaking, a Geo Soloist works completely independently of the rest of the business process and are seen by other professionals within the organization as the "technology guy/gal" or "web guy/gal" or "GIS guy/gal." They work in professional cultures that really don't understand the Geo trade, and typically work closely with non-Geo specialists such as scientists or engineers. A Geo Soloist can be thought of as a "jack of all trades" a "master of none" or a "polymath," commonly required to play the role of GIS analyst, business analyst, project manager, developer, DBA and evangelist, depending on the current project's needs or the issue of the day.

The role of Geo Soloist is not for the faint of heart. It can be challenging and frustrating in that it requires compromises, minimized expectations, and can be disadvantageous. However, it is also a gift. It provides the opportunity to tackle a wide range of problems, provides a wide spectrum of experiences, and fosters resourcefulness, agility and ingenuity.
Serving as a Geo Soloist for many years, I have come up with a manifesto or set of rules to live by that I wanted to share. Many of these are interrelated and this list is not comprehensive but hopefully you will find something that rings home to you. They are in not particular order.
For those of you who have been following my blog, don't worry, I haven't forgotten about parts 3 and 4, just taking more effort than first thought.
"Hey GeoPro, I saw this great something or other at a business luncheon today, can we do that with our stuff."
If this scenario sounds familiar, you may be a Geo Soloist. Generally speaking, a Geo Soloist works completely independently of the rest of the business process and are seen by other professionals within the organization as the "technology guy/gal" or "web guy/gal" or "GIS guy/gal." They work in professional cultures that really don't understand the Geo trade, and typically work closely with non-Geo specialists such as scientists or engineers. A Geo Soloist can be thought of as a "jack of all trades" a "master of none" or a "polymath," commonly required to play the role of GIS analyst, business analyst, project manager, developer, DBA and evangelist, depending on the current project's needs or the issue of the day.

Italian polymath Leonardo da Vinci, scientist, mathematician, engineer, inventor, anatomist, painter, sculptor, architect, botanist, musician and writer.
The role of Geo Soloist is not for the faint of heart. It can be challenging and frustrating in that it requires compromises, minimized expectations, and can be disadvantageous. However, it is also a gift. It provides the opportunity to tackle a wide range of problems, provides a wide spectrum of experiences, and fosters resourcefulness, agility and ingenuity.
Serving as a Geo Soloist for many years, I have come up with a manifesto or set of rules to live by that I wanted to share. Many of these are interrelated and this list is not comprehensive but hopefully you will find something that rings home to you. They are in not particular order.
- Don't start from scratch: There are good "starting points" where someone else has done much of the legwork. An example of this might be some of the sample web map applications that ESRI provides for their new API's.
- Maximize documentation efficiency: This does not mean "do as little as possible." A Geo Soloist is typically working independently so documentation needs to serve their needs only (one benefit of not working in a group, say a team of developers). The other issue is that robust or extensive documentation takes time and requires maintenance given rapid changes. Maintenance also requires alot of time, something that is precious to all of us but especially to a Soloist. Documentation is important, just keep it relevant.
- Simplicity: Keep things simple. Workflows, expectations, requirements, everything. This concept should be a no-brainer but gets lost somehow. Make it your primary goal. Keep is part of every discussion.
- Don't get caught in a worm burrows. It is easy to do so be aware when you begin digging. Use well established patterns. Copy success stories and tweek as needed.
- Stay away from the bleeding edge: Use well established best practices and standards (when appropriate). Follow what the industry is doing and monitor grassroots efforts. Keep yourself educated about where the bleeding edge is and take a couple of steps back from it.
- Pillage: Use resources that are already available. There are so many great resources and given the vibrant, collaborative, brother/sisterhood we work in within the geospatial community, realize that someone has probably already done what you are trying to do and they are probably willing to share.
- Be resourceful: Student internships, collaborative funding relationships, cooperative agreements.
- Embrace the vacuum: This is counter intuitive to most of my other suggestions but exists in a different plane, more closely aligned to day-to-day workflows. We are taught to not work in a vacuum. I agree, but when you are working by yourself (at least as it relates to your immediate trade), trying to meet the needs of your immediate stakeholders, productivity can be very high if you do it your way. The vacuum can be a tool that lowers barriers. An example might be trying to over-collaborate (if there is such a thing) with those who are not specialists in our trade. Don't ask for permission, just do it.
- Be aware: Make sure you are aware of what is going on in the industry. Pick and choose patterns, best practices, standards etc. established by leaders in our community. Social networking tools such as Twitter are a great was to stay connected and informed. Be in touch with industry "buzz." Subscribe to leading industry blog sites that are relevant to your work.
- Manage the managers: Be sure to sell the concepts, but you are the ONE. Don't oversell but don't undersell. Manage expectations but don't underestimate your capabilities.
- Stay Agile: Embrace change, position yourself to manage change. Don't rest on what you know or what you are comfortable with. Don't be afraid of stepping outside your comfort zone. While the Agile process is typically thought of as a software development method, it expresses concepts that can be extended into all aspects of technology management. Have a look at it.
- Never stop learning: This should go without saying but it takes effort. We work on a platform that is like quicksand, ever-changing and it can swallow us up if we aren't nimble. The learning process doesn't have to be formal, simply read one blog a day or tackle 1 chapter in that nasty SQL book this week...then another next week....then another.
For those of you who have been following my blog, don't worry, I haven't forgotten about parts 3 and 4, just taking more effort than first thought.
Friday, August 14, 2009
Web 2.0 and the Geoweb Part 2: Web 2.0 Patterns
Building upon part 1 of this series of lectures slides, part 2 actually examines (albeit at a pretty high level) well documented Web 2.0 patterns active in the Geoweb. Once again, the primary source of my research related to Web 2.0 patterns comes from Web 2.o Architectures by James Governor and et.al among others. Future lectures (parts 3 and 4) will comprehensively examine the Geoweb, using these Web2.0 patterns as a foundation as well as concepts examined by Geoweb experts related to usability, formats, discovery, architecture, etc....
Parts 3 and 4: Comprehensive look at the Geoweb
Parts 3 and 4: Comprehensive look at the Geoweb
Wednesday, August 12, 2009
Web 2.0 and the Geoweb Part 1: Web 2.0 Examples
As I have mentioned earlier, I am ramping up for the upcoming semester and am feverishly prepping. My course, "Introduction To the Geoweb" is part of the Master of Engineering/GIS offered at the University of Colorado at Denver.
In the coming weeks, I intend to share materials I will be presenting to my students to all of you in hopes of getting some constructive feedback from the experts--YOU! I won't be sharing everything, just some selected materials that I think can benefit from some "participatory lecture development" if there is such a thing. I will also be citing much of the work that many of you have contributed so your feedback is critical.
The collection of materials I intend to share is tentatively termed "Web2.0 and the Geoweb." My hope during this series of lectures is to expose students to well documented Web 2.0 patterns and examples as a foundation for further exploration of the Geoweb. Some have suggested that a detailed look at web architectures and http are warranted before this discussion. Rest assured, the students will be prepared for these more advanced concepts.
The primary source of my research related to Web 2.0 patterns and examples comes from Web 2.o Architectures by James Governor and others. It is a good piece, articulating web2.0 patterns in a formal way and has worked nicely for foundational discovery. I have also incorporated materials from several additional sources that have proven adequate.
The story I hope to weave reads something like this: the Geoweb (which I think I can fully embrace) has roots, much of which can be described using well document Web 2.0 patterns. These patterns are best described using real world examples which can then be articulated formally using a standard method of description. This framework then serves as the foundation for further discussions mapping these patterns and subsequent reference models and architectures to Geoweb concepts, some of which have been stewing for some time and others which have emerged recently.
With that said, part 1 of 4 (or maybe 5) slides follow. These are subject to change which goes without saying. Be aware that these are lecture slides so there is a fair amount of text. Students get a little "bent without bullets."
I will be posting my recorded lectures as well. Continue to Part 2: Web 2.0 Patterns.
In the coming weeks, I intend to share materials I will be presenting to my students to all of you in hopes of getting some constructive feedback from the experts--YOU! I won't be sharing everything, just some selected materials that I think can benefit from some "participatory lecture development" if there is such a thing. I will also be citing much of the work that many of you have contributed so your feedback is critical.
The collection of materials I intend to share is tentatively termed "Web2.0 and the Geoweb." My hope during this series of lectures is to expose students to well documented Web 2.0 patterns and examples as a foundation for further exploration of the Geoweb. Some have suggested that a detailed look at web architectures and http are warranted before this discussion. Rest assured, the students will be prepared for these more advanced concepts.
The primary source of my research related to Web 2.0 patterns and examples comes from Web 2.o Architectures by James Governor and others. It is a good piece, articulating web2.0 patterns in a formal way and has worked nicely for foundational discovery. I have also incorporated materials from several additional sources that have proven adequate.
The story I hope to weave reads something like this: the Geoweb (which I think I can fully embrace) has roots, much of which can be described using well document Web 2.0 patterns. These patterns are best described using real world examples which can then be articulated formally using a standard method of description. This framework then serves as the foundation for further discussions mapping these patterns and subsequent reference models and architectures to Geoweb concepts, some of which have been stewing for some time and others which have emerged recently.
With that said, part 1 of 4 (or maybe 5) slides follow. These are subject to change which goes without saying. Be aware that these are lecture slides so there is a fair amount of text. Students get a little "bent without bullets."
I will be posting my recorded lectures as well. Continue to Part 2: Web 2.0 Patterns.
Subscribe to:
Posts (Atom)